I’ve copied this content from http://www.canerod.com/rodmakers/tips/binder.html (Wayback Machine). I’ve reformatted it for reading and placed the images in-line after each paragraph.
Unlocking the Mysteries of the Garrison Binder #
by Chris Bogart
Hiding this ramble.
Hiding this ramble.
Did you ever wonder why (to quote Andy Rooney) the Garrison binder is for many rodmakers the source of contentious problems while other rodmakers never seem to have problems. One of the primary reasons for the mystery the Garrison binder presents is that rodmakers often built it by following a diagram in a book and then hoped for the best. As a result, some binders worked as desired because of dumb luck and others didn’t because of bad luck. When the binder did not behave and was cantankerous to use, it was assumed that it worked that way for the master himself. I have since learned that when properly constructed and adjusted (tuned) the Garrison binder is a pleasure to operate and does a great job with little problems.
This article will discuss the how and why of constructing the Garrison binder and then how to tune it to perform at it’s best. Like most people, I first blindly followed a diagram in a book and did some things right and did some things wrong. It was initially hard for me to tell what was important and critical to its operation and what wasn’t. I have since looked at numerous other rodmakers’ binders and discussed their operation and their solutions to traditional problems. I have applied the lessons learned to my binder with great success. I have come to the following conclusions on how the Garrison binder should be constructed and why.
The Garrison binder is essentially an incredibly simple but clever device. What makes it mysterious is that there are very subtle things that are sometimes not obvious that have impact upon performance. The heart of the binder is the cradle that holds the rod, the drive belt that wraps around the rod applying pressure and the string that binds the segments together. It is here where we will analyze the binder.

The Cradle #
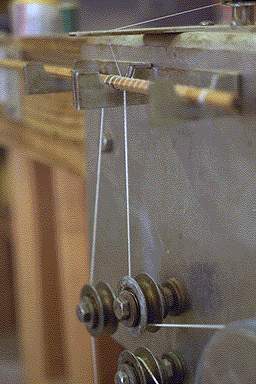
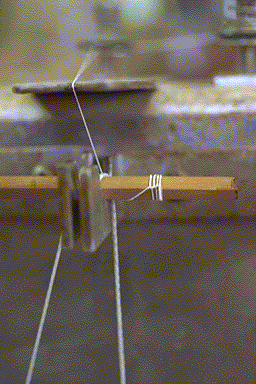
The cradle is the starting point from which to build the rest of the binder. Everything else is aligned relative to the cradle. The point from which all this alignment is done is the bottom of the trough (half circle) that holds the rod. The size of the trough is not important. I find a larger diameter (approximately 1" or larger) trough is easier to use than a small one (5/8"). Too small and it constrains the rod on larger sections. The space left between the two sections determines the spacing of wraps of the binding cord. This space is usually just wide enough (3/16 - 1/4") so the drive belt fits but doesn’t constrain it. This distance needs to be adjusted until you get a good working distance. This is why there are slots so it can be adjusted by sliding the cradle back and forth. I recommend only adjusting the left side since all other alignments and positioning is done from the right side. Once the cradle is in place, then all other parts of the binder will be aligned to it referenced to the trough bottom of the forward side of the cradle. This is where the drive belt comes out.
Feed Supports #
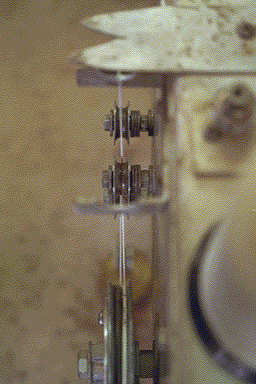
The in-feed and out-feed supports can be aligned using a wooden dowel. The out feed supports have troughs that are of a larger diameter (1 and 3/4 inches). The centers of the bottom of the support troughs need to be the same distance from the binder as the cradle trough is. On the parallel plane to the binder face centered on our reference point all guide wheels and the drive wheel.
Drive Wheels #
Word about drive wheels. Most wheels are too shallow and the drive belt easily jumps out of it. This is also true concerning the pulley that holds the weight. I have switched from a small one to a larger one that has a good deep wheel. I found a ready source for these at my local hardware store. I disassemble two wheeled pulleys for my guide wheels. These wheels have a standard 5/16 ID holes that fits the bolts I use as an axle.
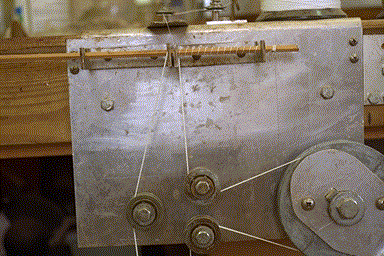
Now for the placement of the first guide whose position is very important and its misplacement will cause problems. It should be positioned so the drive belt does not drag on the cradle. This means the angle of the drive belt to it should not be equal or greater than 180 degrees. It should be approximately 170 degrees or less, or if you prefer a clock reference, about 25 minutes pass the hour. On most diagrams of binders this point is not clear. I feel that when diagrams of the binder where made the graphic artist did not appreciate this fact and aligned the wheels to make it look neat. Wrong, this neatness has caused many problems. On my binder the angle is the maximum it could be (29 minutes pass the hour) without causing problems (dumb luck). I have seen other rodmakers who have bought binders that where made with this wheel too far left and it causes drag. This drag is one cause of problems that can cause twists in the rod. I know of one modification that uses a rod to push the belt out away from the cradle that some rodmakers use to try and correct this problem. Easiest way to remedy the problem is to move the wheel to the right.
Now for the good news, the placement of the other wheels and drive wheel are not critical. They just guide the belt. On the left side of the cradle the cord usually doesn’t drag and most rodmakers don’t have it close to the cradle.
Binding Cord #
The last part of constructing the binder is the components for holding the binding cord, its guide path, and a tensioning device. The binding cord usually comes on a spool or bobbin depending on the rodmaker’s source. I have the large industrial spool. The trick here is to let the cord come off the spool with no drag. I previously let the spool turn as I pulled the cord off. After a lot of use, the spool did not turn easily and caused drag. This increased tension on the cord and would cause the rod to twist. I solved this problem by using a 1/8 brass rod with a loop in the end that is long enough to allow the cord to freely come off the spool upwards. The rod also serves as shock absorber (like the tip of your fly rod with a delicate tippet) even if the cord drags a bit it does not cause excess tension. The cord then flows through the guides and tensioner to the last guide that allows the cord to come from behind into the drive belt and rod at approximately 45 degree angle. You do not want the cord to come directly down to where it is being bound. It must come from the same direction the rod that is being bound.
Drive Belt #
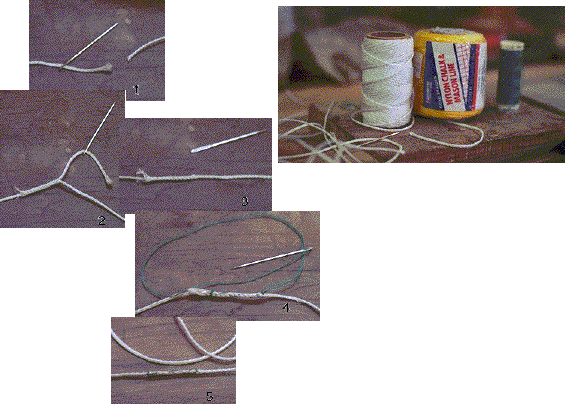
How to make a knotless drive belt is easy. I use braided chalk and mason line for my drive belt. It can be found in most hardware stores. Do not choose twisted line for this purpose. To make a make the knotless drive belt you will need a large sewing needle whose eye is big enough for the line. Once you cut the line to approximate length, thread the line through the eye of the needle for about 2 - 3 inches. Because the line is braided, you can take the needle and stick it into the hollow core or the other end of the line for about 1 and 1/2 inches and then out through the line. You can now remove the needle and pull the line back until the end just goes back into the line. I now take a regular needle and thread and make a few stitches to hold the line in place with a few extras where it comes out to keep the braid from unraveling. The is just like a snake eating itself. No glue or knots are needed and you will never know when the spliced area goes around the rod. The splice is very flexible and never binds. Making this knotless belt takes very little time and requires very little effort or skill.
Weight #
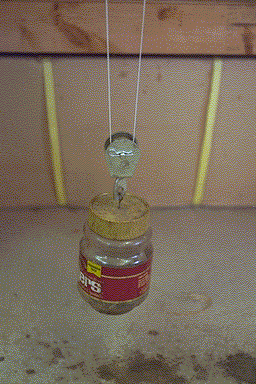
Now for the last part of tuning your binder, adjusting weights and tension. First, adjust the weight you have on the pulley that rides on the drive belt. This is the mechanism for applying pressure to the glued up rod. More weight is not necessarily better. I feel that the weight should be a little as necessary to give satisfactory results. I use a coffee jar that has old nuts and bolts in it as a weight . I can add and subtract weight easily. The first sign of excess weight is the rod will drag on the cradle. Look carefully at the rod to see if you have rounded or chipped the corners of the rod. Look also at the bottom of the cradle. I used a soft metal (Aluminum) for my binder and the bamboo will actually shave off metal if there is too much weight. So play with the weight so that you are not destroying your rod or binder. I have found that about 1 - 1.5 pounds is more than enough. This weight is based upon the glue (epoxy) I use. You may want to have one weight for butts and one for tips depending on the type of rods you build. I use the same weight for both and have had no ill effects.
Tension #
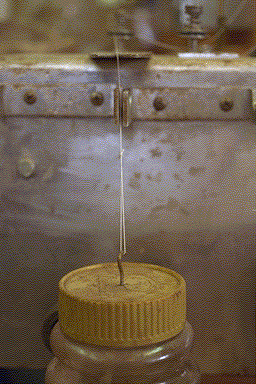
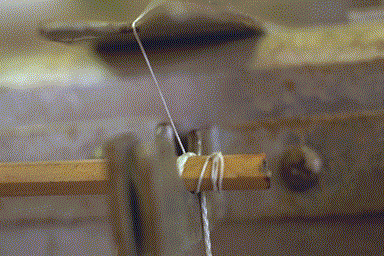
You now need to tension the binding cord. You now need to tension the binding cord. The binding cord does not apply any clamping pressure to the rod. It just holds the pressure that has been applied by thedrive belt. It wraps the rod maintaining the pressure. Too much tension on the drive cord will cause a twist. Normally this will happen on the first pass and cannot be corrected on the second. What happens is the excess tension starts to pull the rod segments and this causes them to rotate them. The tension should be adjusted to allow a firm even pull on the binding cord. A good way to check to see if there is too much tension is to tie a loop in the cord and hang the weight on it. If the binding cord holds the weight, then there is too much tension. The weight should pull the binding cord easily. I know other rodmakers that use a small spring scale to measure and adjust the tension so weight and tension are even. I believe that tension should be slightly less than the weight.
With a properly tuned and adjusted Garrison binder you achieve excellent results. The only problem I have had is when the binding cord has had too much tension on it. That problem is now solved. I now have now had numerous rods that come out of gluing straight and true, requiring little or no straightening. Understanding your Garrison binder and making some subtle changes can allow you to get maximum performance out of it.